
DIY: How To Make Apple Roses (Pear & Sweet Potato ones too!)

Oh holiday season! The best time to really put the extra work into making your food look spectacular! Bring on the drama! Bring on the gorgeous details! Bring on the...stress!? NO WAY! Tinkering in the kitchen with new ideas should be fun and this year I want you to take your dessert (or cocktails) to the next level of style!
One of the simplest ways!? Edible fruit rosettes! I want you to make these so badly, that I've put together an easy little tutorial that will help you learn how to make Apple Roses (or pear and sweet potato ones for that matter) beautifully in a snap.
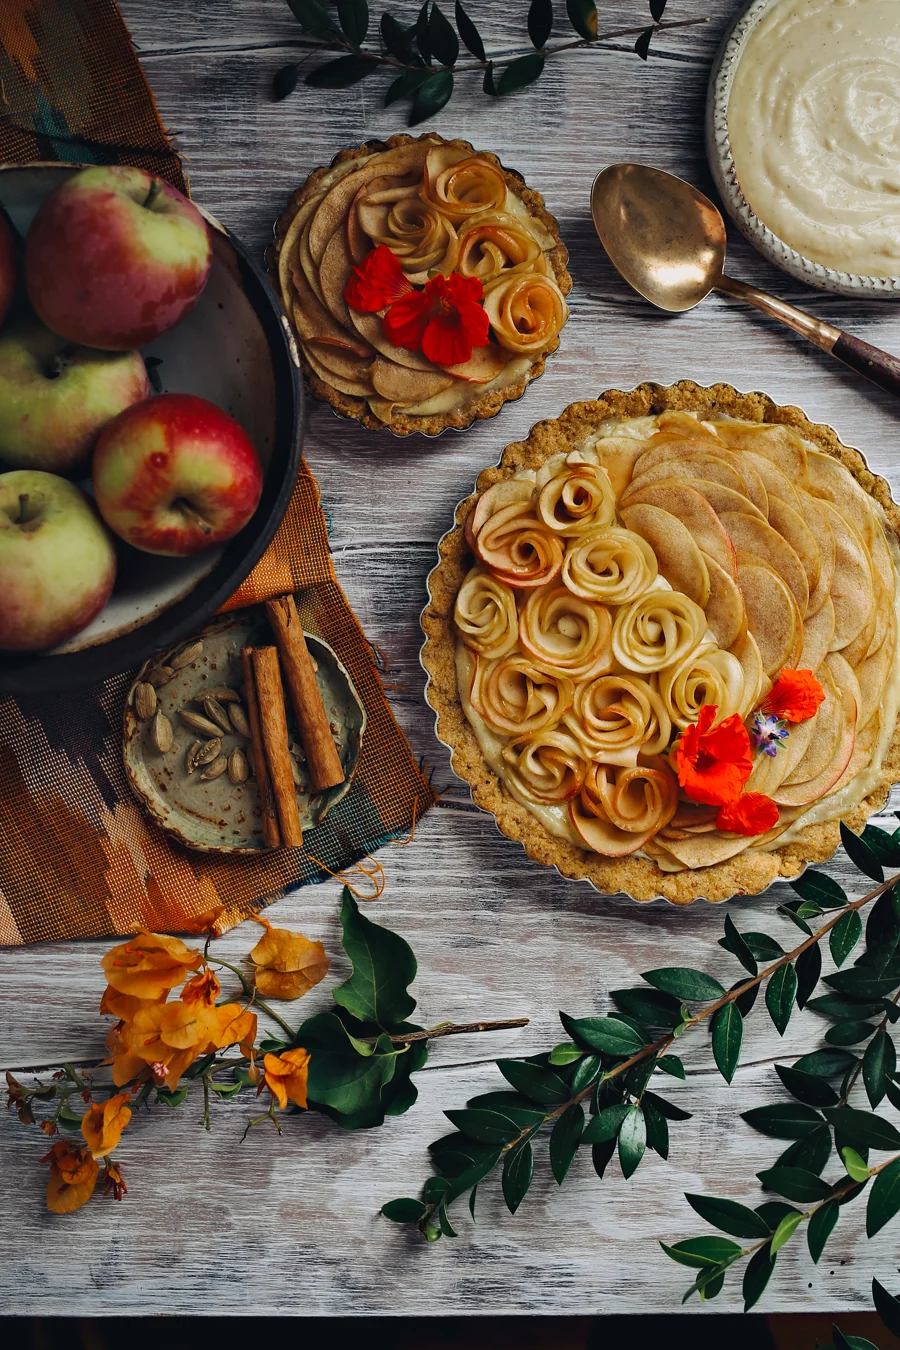
Once you've mastered this technique (which won't take long) - you'll be looking for any and all opportunities to place these delicate little buds on all of your holiday goodies. Speaking of... Check out my Apple & Cardamom Custard Tart and put them on that. It's probably my favorite dessert I've ever made, add it on your holiday to-do...she's a beaut!
Ready to roll up some roses!? Let's go!


- Apple Roses -
QUANTITY
1 medium sized apple = 4 - 5 petite roses
Approx. 6-8 thin slices = 1 rose (1 1/4 inch diameter)
DIRECTIONS
1. Fill a large bowl with cold water and juice of one lemon.
2. Core apple and cut into four large chunks, using a sharp knife or a mandolin, cut each chunk into very thin slices and place in lemon water. Experiment with different types of apples, each will very in color due to the individual skin.
3. Pre-heat oven to 350F and place slices as a singular layer on a silpat lined baking sheet. Bake for 10-15 minutes until apples are pliable. If you have a microwave, you can layer on a plate and cook for 2 - 3 minutes. Allow to fully cool before forming rosettes.
4. Place 6-8 slices of apple in a row with the ends overlapping, carefully roll up the apples into a tube-like shape. Pick up the bud, holding the bottom end, and pull/fluff with fingers until petals open.
5. Place finished rose in a mini muffin tin and finalize shape. Leave until you're ready to assemble on top of your dessert.
6. To Assemble on top of your dessert, it's ideal for the base of rose to sit in a soft layer such as frosting or custard. If garnishing a cocktail, bake roses in mini cupcake tin for 10 minutes at 350F to help hold their shape on a cocktail pick.
7. Helpful Tip: If adding on top of a dessert prior to baking, make sure to glaze apples with a little apricot jam to keep them from drying out. Apples should cook 10-15 minutes regardless of being placed onto dessert or used alone to retain shape and flavor.

Pear Roses:
Sweet & Stylish! Follow the exact steps as above.
Sweet Potato & Yam Rosettes:
Rustic and refined! Mandoline your petals paper thin for easier rolling. After forming secure base with a criss cross of tooth picks and place into a muffin tin and spray lightly with cooking oil. They will need to be baked at 400F for 5-10 minutes until the potatoes are cooked and slightly crispy. Depending on the recipe you're topping these with, you can bake simultaneously with your pie or casserole by adding roses mid-cook or at the very end depending on your creation. Just make sure they have at least 5-10 minutes to cook regardless. For a sweeter version, try tossing your potato petals in a mixture of melted butter, sugar and cinnamon before forming.
